What Is Terraform ?
Terraform is the infrastructure as code offering from HashiCorp. It is a tool for building, changing, and managing infrastructure in a safe, repeatable way. Operators and Infrastructure teams can use Terraform to manage environments with a configuration language called the HashiCorp Configuration Language (HCL) for human-readable, automated deployments.
Terraform supports multi-cloud orchestration such as AWS, Azure, OpenStack, etc as well as on-premises deployments. This is really helpful when we use two different resources from two different cloud providers at the same time.
What is Infrastructure as Code ?
If you are new to infrastructure as code as a concept, it is the process of managing infrastructure in a file or files rather than manually configuring resources in a user interface. A resource in this instance is any piece of infrastructure in a given environment, such as a virtual machine, security group, network interface, etc.
At a high level, Terraform allows operators to use HCL to author files containing definitions of their desired resources on almost any provider (AWS, GCP, GitHub, Docker, etc) and automates the creation of those resources at the time of apply.
Terraform is a stateful application
What that means is that it keeps track of everything it builds in your cloud environments, so that if you need to change something or delete something later, Terraform will know what it built, and it can go back and make those changes for you.
That state is stored in what we call a state file. This is an important file that keeps track of everything that Terraform builds, and it’s used by Terraform in case you need to change anything.
Terraform using Azure Cloud Shell
As I explained in the video , we are going to use Microsoft Azure for our demo , where we are going to see
how to use the portal and the power of the Cloud Shell .
First we are going to see how to create a resource group using Terraform and we are going to see how to destroy it and later we are going to see how to create a Linux Virtual machine and how to delete it with it’s resource group .
Creating a resource group using Terraform
First Thing as I explained in the video , and before we start using Terraform we need to choose the right Subscription that we are going to work on it , cause it’s not logic to test on a prod environment or a client Subscription .
First Thing we need to do is to launch the Cloud Shell editor as in the picture below
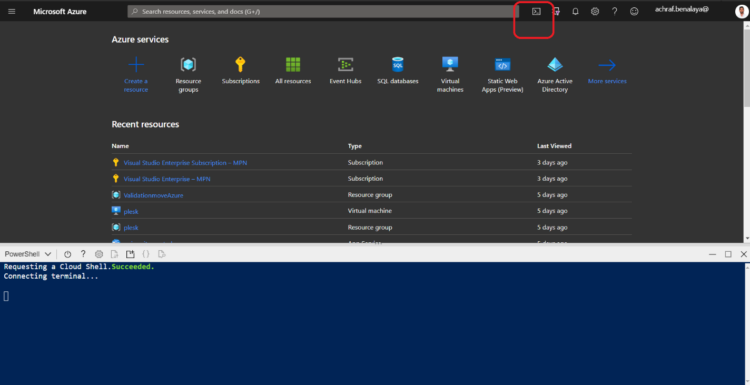
Now we need to check our account using the power-shell command :
az account show
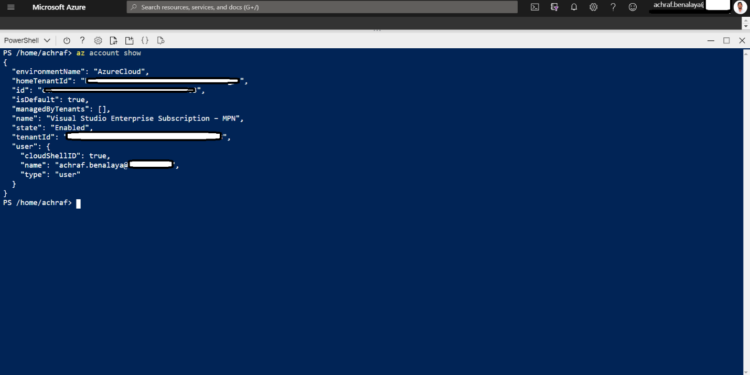
You may have access to multiple available Azure subscriptions,so you need to use az account list to display a list of subscription name ID values:
az account list --query "[].{name:name, subscriptionId:id}"
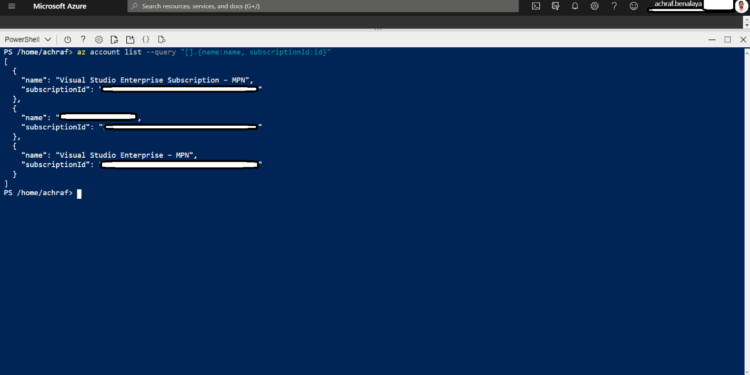
To use a specific Azure subscription for the current Cloud Shell session, use az account set. Replace the <subscription_id> placeholder with the ID (or name) of the subscription you want to use
az account set --subscription="<subscription_id>"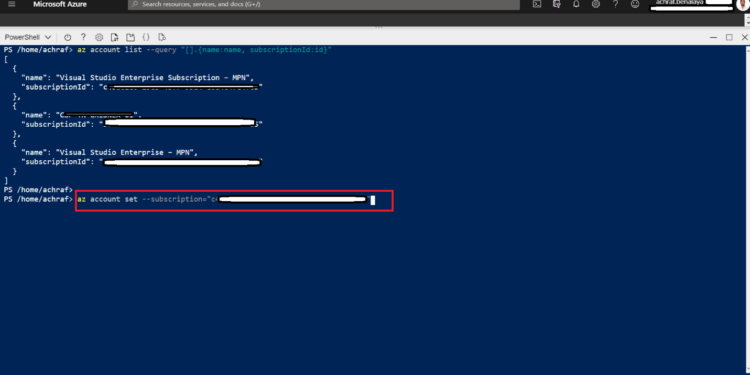
now in order to create a terraform file we need to go to our cloudrive folder
cd clouddrive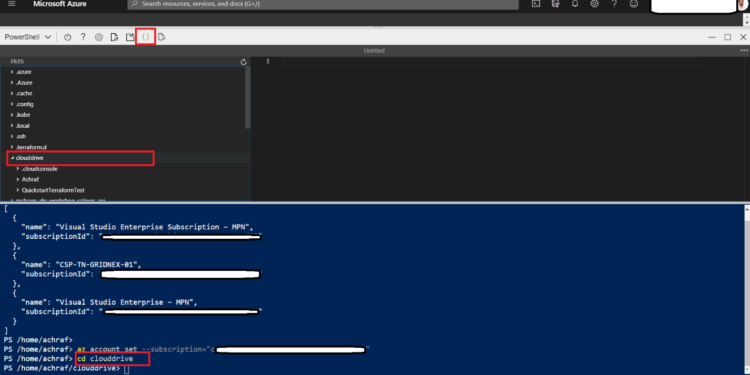
and now we are going to create a new folder where we are going to do our work
mkdir DemoYoutube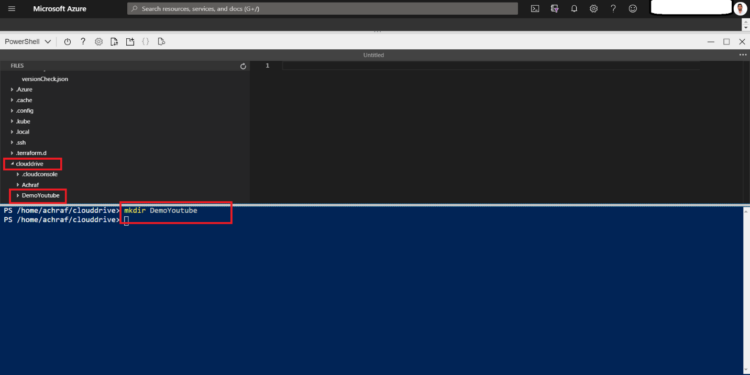
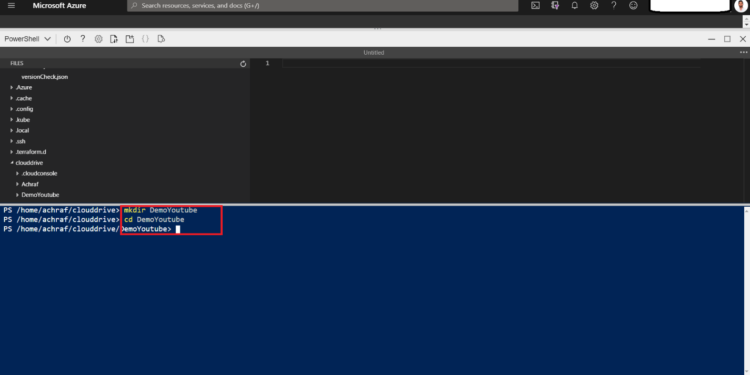
Now It’s the time to create a Terraform configuration file :
provider "azurerm" {
  # The "feature" block is required for AzureRM provider 2.x.
  # If you are using version 1.x, the "features" block is not allowed.
  version = "~>2.0"
  features {}
}
resource "azurerm_resource_group" "rg" {
        name = "Demo-rg"
        location = "francecentral"
}
To write the File , you should use the command :
code Demo.tf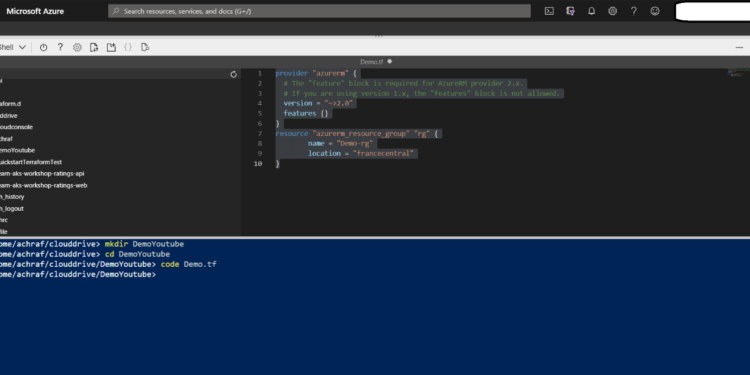
and now you need to save your file and close the editor : (<Ctrl>S) and (<Ctrl>Q).
Create and apply a Terraform execution plan H2
To Initialize the Terraform deployment you need to use : terraform init. This step downloads the Azure modules required to create an Azure resource group
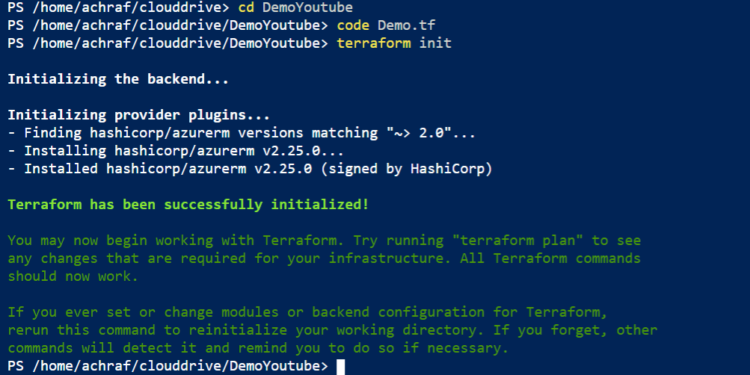
Now everything is ready , we need to run terraform plan to create an execution plan from our Terraform configuration file.
terraform plan -out Demo.tfplan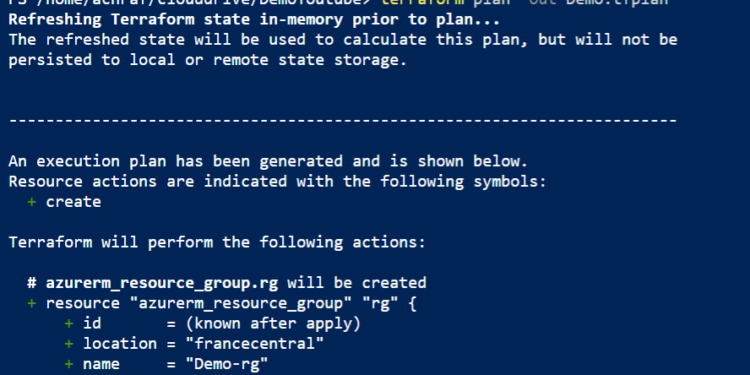
The terraform plan command creates an execution plan, but doesn’t execute it. Instead, it determines what actions are necessary to create the configuration specified in your configuration files.
This pattern allows you to verify whether the execution plan matches your expectations before making any changes to actual resources.
Now if you verified the plan and want to excute it you need to run the follow command :
terraform apply Demo.tfplan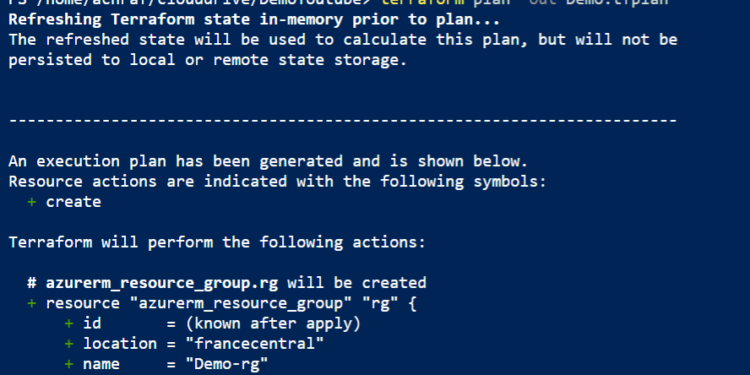
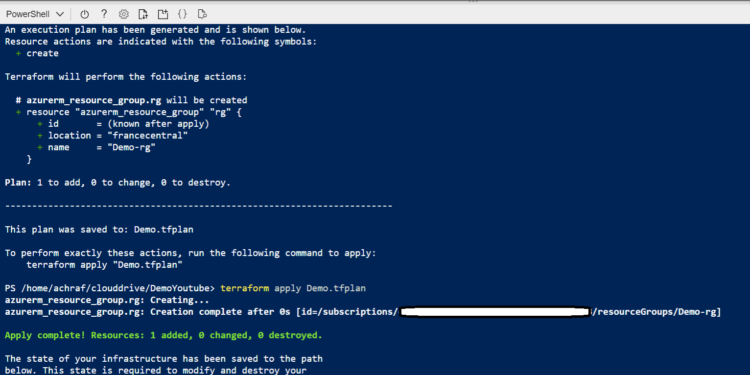
To check if the ressource group was created we can run the follow command to check it’s creation :
az group show -n "Demo-rg"
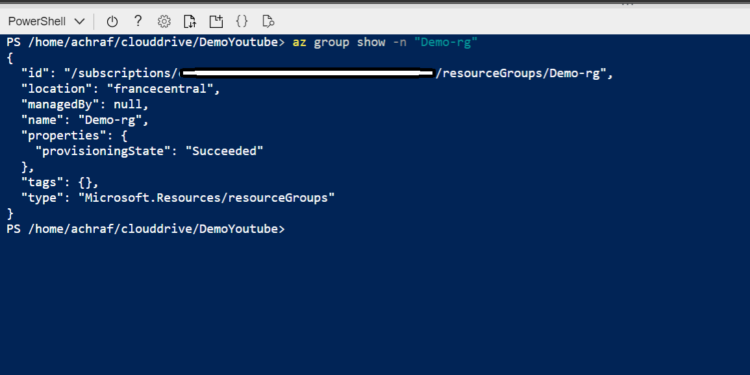
Else , we can open the Portal and check if it exist :
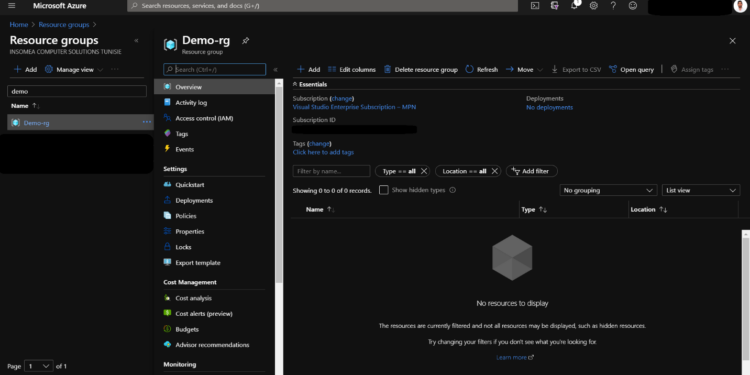
Now what if we want to Delete this resource group , by destroying the plan we can delete it .
To destroy the plan that we have created we should run :
terraform plan -destroy -out Demo.tfplanAnd to execute the plan we should run :
terraform apply Demo.tfplanNow , as we created the old plan we are going to create a new one as explained in the video below
Create a Linux VM with infrastructure using Terraform :
For the source code for the Plan and the explication :
# Configure the Microsoft Azure Provider
provider "azurerm" {
    # The "feature" block is required for AzureRM provider 2.x.
    # If you're using version 1.x, the "features" block is not allowed.
    version = "~>2.0"
    features {}
}

# Create a resource group if it doesn't exist
resource "azurerm_resource_group" "myterraformgroup" {
    name     = "Demo-rg"
    location = "francecentral"

    tags = {
        environment = "Terraform Demo"
    }
}

# Create virtual network
resource "azurerm_virtual_network" "myterraformnetwork" {
    name                = "myVnet"
    address_space       = ["10.0.0.0/16"]
    location            = "francecentral"
    resource_group_name = azurerm_resource_group.myterraformgroup.name

    tags = {
        environment = "Terraform Demo"
    }
}

# Create subnet
resource "azurerm_subnet" "myterraformsubnet" {
    name                 = "mySubnet"
    resource_group_name  = azurerm_resource_group.myterraformgroup.name
    virtual_network_name = azurerm_virtual_network.myterraformnetwork.name
    address_prefixes       = ["10.0.1.0/24"]
}

# Create public IPs
resource "azurerm_public_ip" "myterraformpublicip" {
    name                         = "myPublicIP"
    location                     = "francecentral"
    resource_group_name          = azurerm_resource_group.myterraformgroup.name
    allocation_method            = "Dynamic"

    tags = {
        environment = "Terraform Demo"
    }
}

# Create Network Security Group and rule
resource "azurerm_network_security_group" "myterraformnsg" {
    name                = "myNetworkSecurityGroup"
    location            = "francecentral"
    resource_group_name = azurerm_resource_group.myterraformgroup.name

    security_rule {
        name                       = "SSH"
        priority                   = 1001
        direction                  = "Inbound"
        access                     = "Allow"
        protocol                   = "Tcp"
        source_port_range          = "*"
        destination_port_range     = "22"
        source_address_prefix      = "*"
        destination_address_prefix = "*"
    }

    tags = {
        environment = "Terraform Demo"
    }
}

# Create network interface
resource "azurerm_network_interface" "myterraformnic" {
    name                      = "myNIC"
    location                  = "francecentral"
    resource_group_name       = azurerm_resource_group.myterraformgroup.name

    ip_configuration {
        name                          = "myNicConfiguration"
        subnet_id                     = azurerm_subnet.myterraformsubnet.id
        private_ip_address_allocation = "Dynamic"
        public_ip_address_id          = azurerm_public_ip.myterraformpublicip.id
    }

    tags = {
        environment = "Terraform Demo"
    }
}

# Connect the security group to the network interface
resource "azurerm_network_interface_security_group_association" "example" {
    network_interface_id      = azurerm_network_interface.myterraformnic.id
    network_security_group_id = azurerm_network_security_group.myterraformnsg.id
}

# Generate random text for a unique storage account name
resource "random_id" "randomId" {
    keepers = {
        # Generate a new ID only when a new resource group is defined
        resource_group = azurerm_resource_group.myterraformgroup.name
    }

    byte_length = 8
}

# Create storage account for boot diagnostics
resource "azurerm_storage_account" "mystorageaccount" {
    name                        = "diag${random_id.randomId.hex}"
    resource_group_name         = azurerm_resource_group.myterraformgroup.name
    location                    = "francecentral"
    account_tier                = "Standard"
    account_replication_type    = "LRS"

    tags = {
        environment = "Terraform Demo"
    }
}


# Create virtual machine
resource "azurerm_linux_virtual_machine" "myterraformvm" {
    name                  = "myVM"
    location              = "francecentral"
    resource_group_name   = azurerm_resource_group.myterraformgroup.name
    network_interface_ids = [azurerm_network_interface.myterraformnic.id]
    size                  = "Standard_DS1_v2"

    os_disk {
        name              = "myOsDisk"
        caching           = "ReadWrite"
        storage_account_type = "Premium_LRS"
    }

    source_image_reference {
        publisher = "Canonical"
        offer     = "UbuntuServer"
        sku       = "16.04.0-LTS"
        version   = "latest"
    }

    computer_name  = "myvm"
    admin_username = "azureuser"
    admin_password = "Password1234!"
    disable_password_authentication = false


    boot_diagnostics {
        storage_account_uri = azurerm_storage_account.mystorageaccount.primary_blob_endpoint
    }

    tags = {
        environment = "Terraform Demo"
    }
}
Hope You enjoyed this post about Terraform , we will do more blog post about it in the future.
