Hello, it’s been a month and a half since I last wrote about aks and azure. It’s been a very busy time for me, particularly since I moved into a new apartment. However, I’ll be posting once a week going forward.
So let’s get going.
In this series, we’ll learn how to set up our infrastructure using Azure and Azure DevOps. We’ll learn how to establish aks, acr, and all the resources we’ll need for our project, including the storage account and the service connection.
You can follow the instructions in this document to deploy our infra as code , as for deployment we will use a private agent dedicated to our organisation , this article will not cover that ,you can follow the instruction in this article to see how to create a Self-hosted agent in azure and how to use it .
This article is a part of a series:
- Part 1 : How to setup nginx reverse proxy for aspnet core apps with and without Docker compose
- Part 2 :How to setup nginx reverse proxy && load balancer for aspnet core apps with Docker and azure kubernetes service
- Part 3 : How to configure an ingress controller using TLS/SSL for the Azure Kubernetes Service (AKS)
- Part 4 : switch to Azure Container Registry from Docker Hub
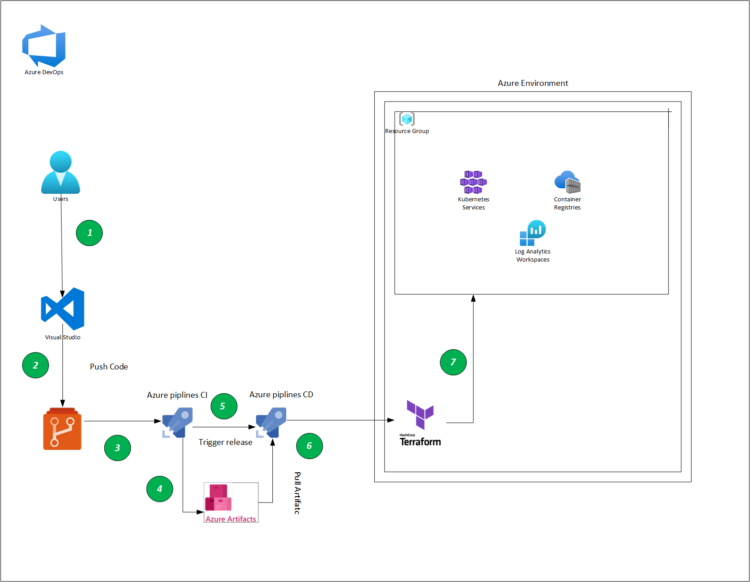
- Part 5 (A-B) : Using Azure DevOps, Automate Your CI/CD Pipeline and Your Deployments
- Part 6 : Using Github, Automate Your CI/CD Pipeline and Your Deployments
- Part 7 : Possible methods to reduce your costAnd today we are at this part
Part 5 – A : Creating Storage account and setting up service connection with azure DevOps
Part 5- B : Creating CI/CD pipeline
Part 1 : Creating The Storage account
Setting up the storage account for our infrastructure is so important detailed informations in this article DevOps : Deploy infrastructure using Terraform and Azure DevOps pipelines
# Set the Azure subscription you want to use if you have multiple subscriptions
Set-AzContext -SubscriptionId <SubscriptionId>

<----------------------------------------------------------------------------------------------------->
# Set the resource group properties name and location
$rgName = "azure-loves-terraform-2023"
$location = "francecentral"

<----------------------------------------------------------------------------------------------------->
# Create the resource group
New-AzResourceGroup -Name $rgName -Location $location

<----------------------------------------------------------------------------------------------------->
#Create Storage account


$location = "francecentral"
$rgName = "azure-loves-terraform-2023"
$accountName = "mystorageaccount2023"

$st = New-AzStorageAccount -ResourceGroupName $rgName -Name $accountName `
    -Location $location -SkuName Standard_GRS -AccessTier Hot `
    -Kind StorageV2 -AllowCrossTenantReplication $false `
    -AllowBlobPublicAccess $false -PublicNetworkAccess Disabled `
    -RequireInfrastructureEncryption -MinimumTlsVersion TLS1_2

# Enable containers soft delete :  retention of 60 days.
Enable-AzStorageContainerDeleteRetentionPolicy -ResourceGroupName $rgName `
    -StorageAccountName $accountName `
    -RetentionDays 60

# Enable blob soft delete : retention of 60 days.
Enable-AzStorageBlobDeleteRetentionPolicy -ResourceGroupName $rgName `
    -StorageAccountName $accountName `
    -RetentionDays 60

# Enable change feed and versioning .
Update-AzStorageBlobServiceProperty -ResourceGroupName $rgName `
    -StorageAccountName $accountName `
    -EnableChangeFeed $true `
    -ChangeFeedRetentionInDays 60 `
    -IsVersioningEnabled $true

# Enable point-in-time restore with a retention period of 59 days.
# The retention period for point-in-time restore must be at least one day less than that set for soft delete.
Enable-AzStorageBlobRestorePolicy -ResourceGroupName $rgName `
    -StorageAccountName $accountName `
    -RestoreDays 59

# View the service settings.
Get-AzStorageBlobServiceProperty -ResourceGroupName $rgName `
    -StorageAccountName $accountName
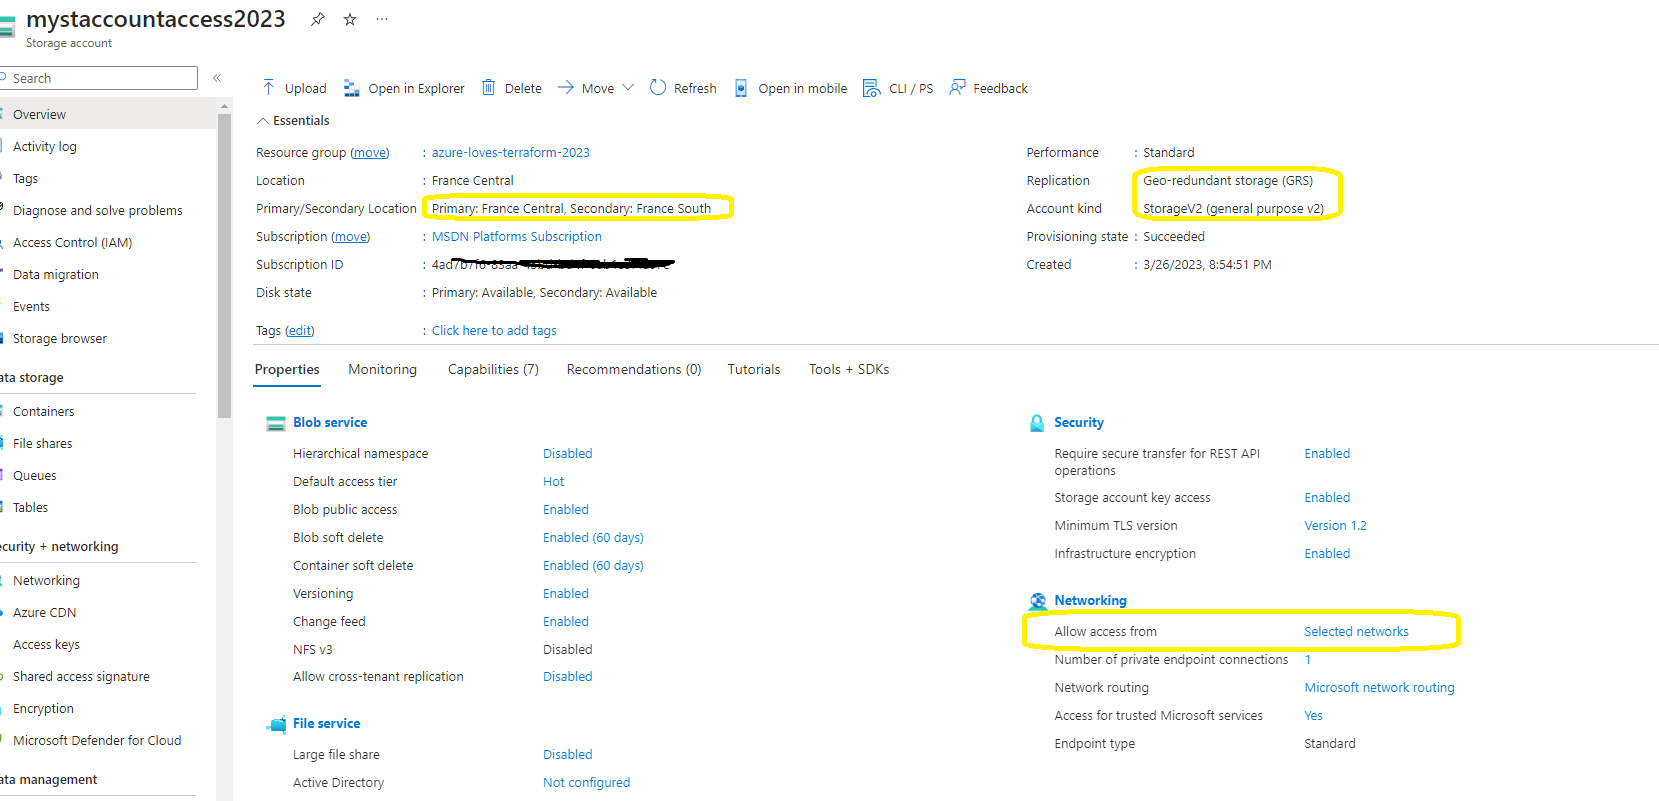
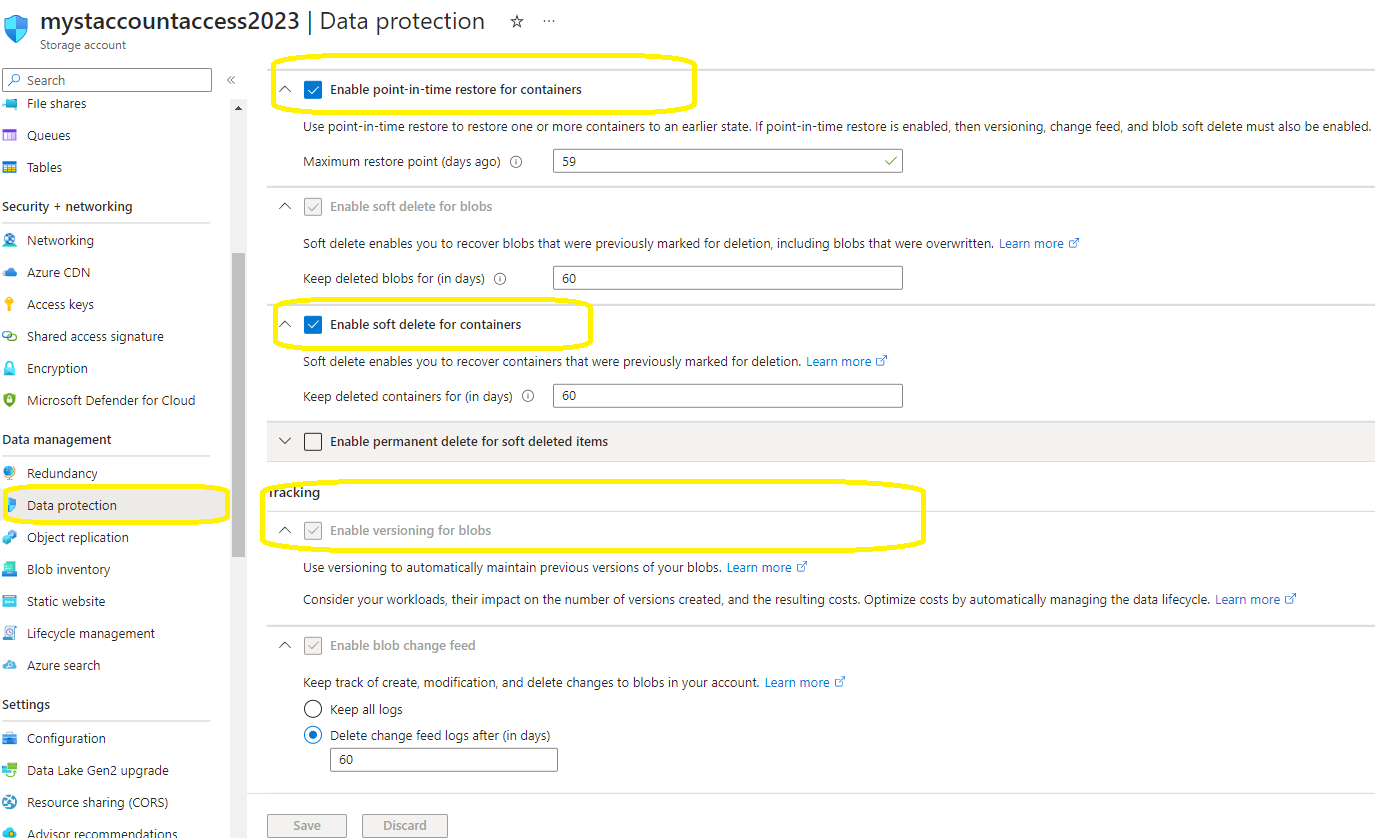
and we will end up by having a storage account like this :
As you can see, a few configurations have been made up to safeguard and restore our storage account in the event of a malfunction.
for that we have enabled
- Enable point-in-time restore for containers : in order to restore one or more containers to an earlier state .
- Enable soft delete for blobs : in order to recover blobs that were previously marked for deletion, including blobs that were overwritten .
- Enable soft delete for containers : in order to ecover containers that were previously marked for deletion .
- Enable versioning for blobs : to automatically maintain previous versions of your blobs .
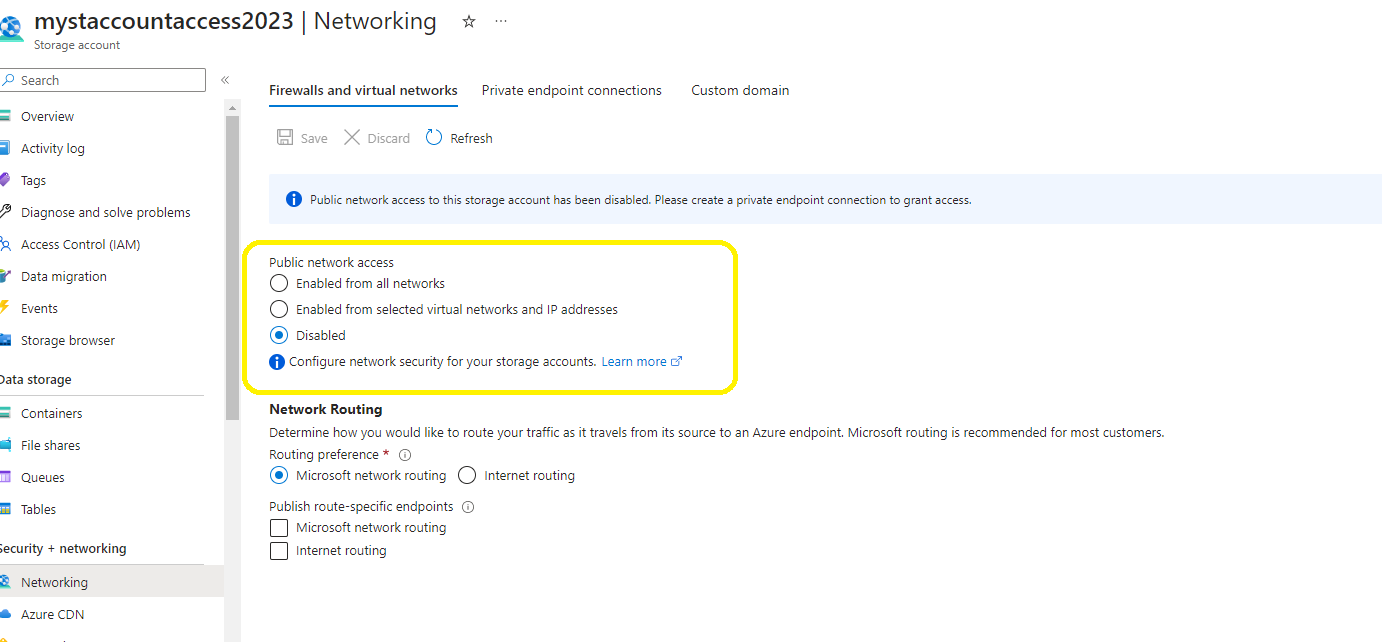 As you can see, we have disabled access to this storage account because, to be protected, it should only be accessible from the Self-hosted agent that we will establish a private endpoint with it.
Setting Private Endpoint :
This storage mainly will contain the tfsate for our Terraform .
We never know when we’ll need in-depth diagnostic and auditing information for the resources we’ve made, so I also advise turning on “Diagnostic settings” and sending all logs to Log Analytics workspace and archiving to a storage account.
Part 2: Create application registration
We must authorize Azure DevOps to deploy to the resource group we’ve established (azure-loves-terraform-2023) through a service connection we’re going to set up.
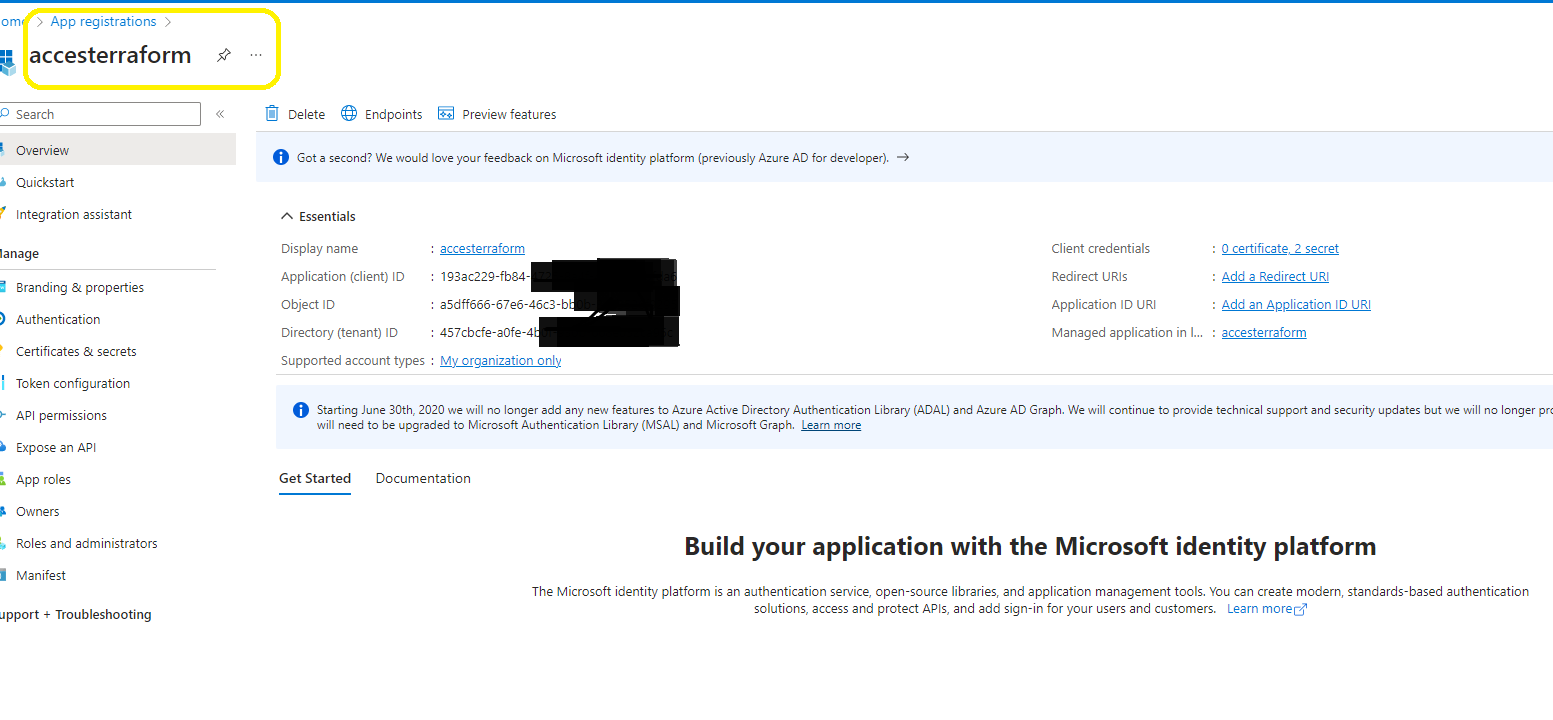
First thing we need to create an “App registrations”
and we need one more thing to do before we set up azure DevOps , is to create “Certificates & secrets” (do not forgot to save the value because we are going to use it later )
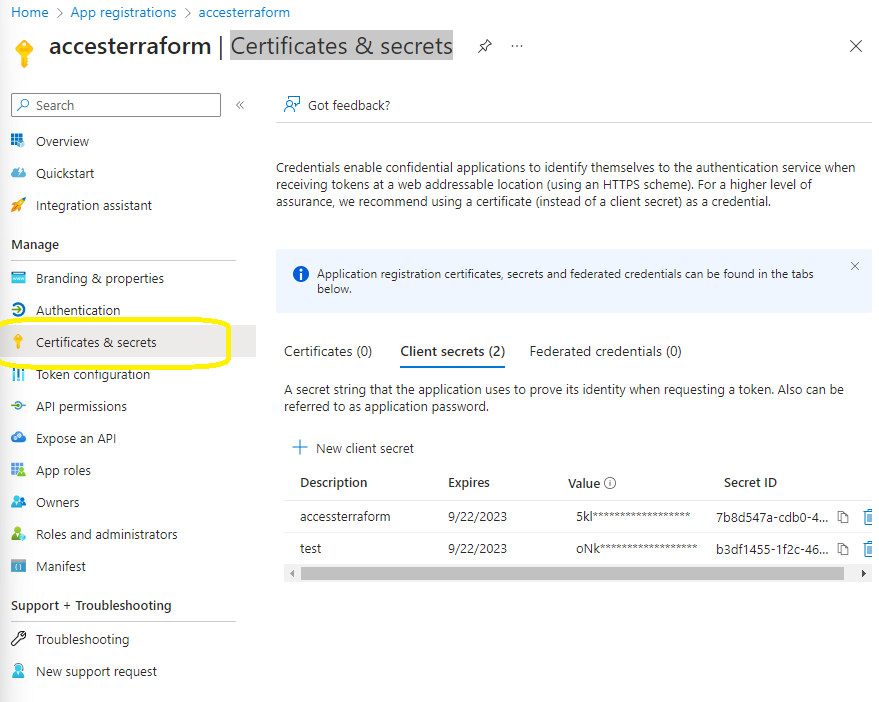 Before moving on to Azure DevOps, there is still one more stage in which we will grant access control to the application we have created as the owner of our resource group (in other circumstances, I grant Contributor Role).
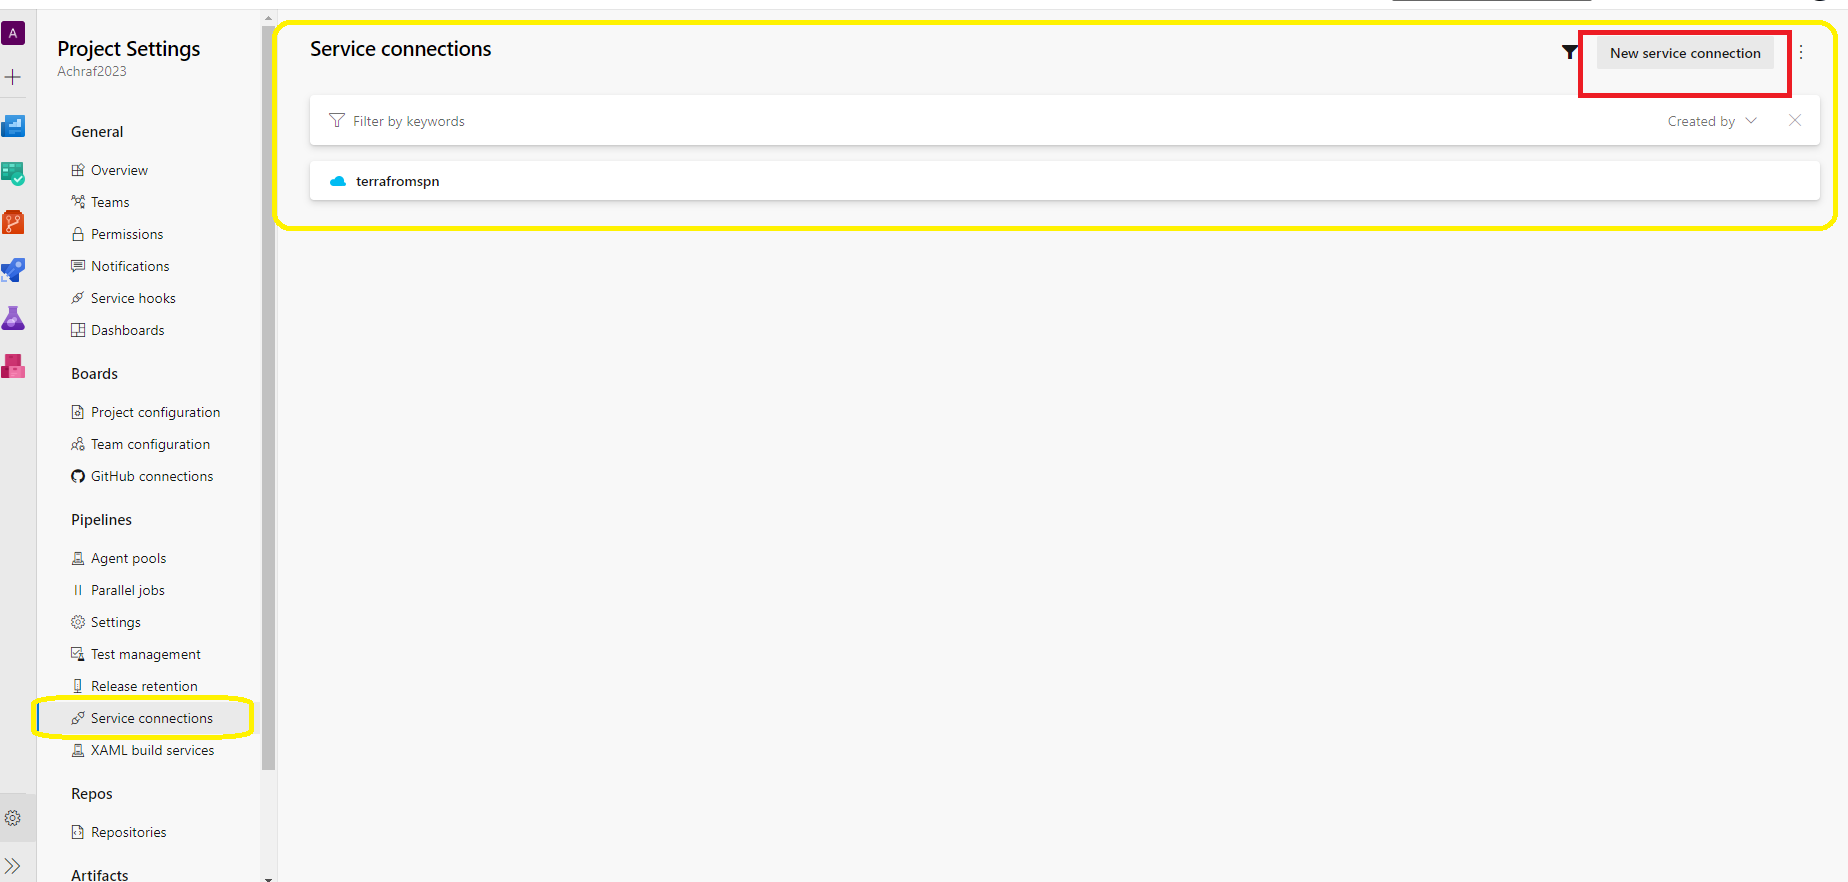
Now let’s setup Azure DevOps .
Part 3 : Create a service connection
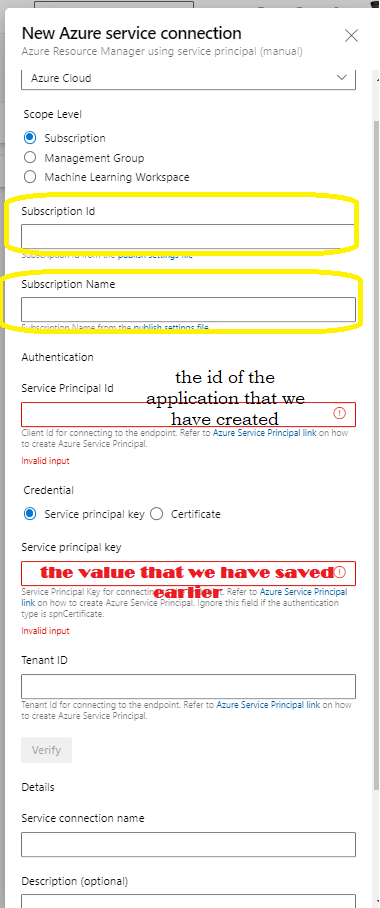
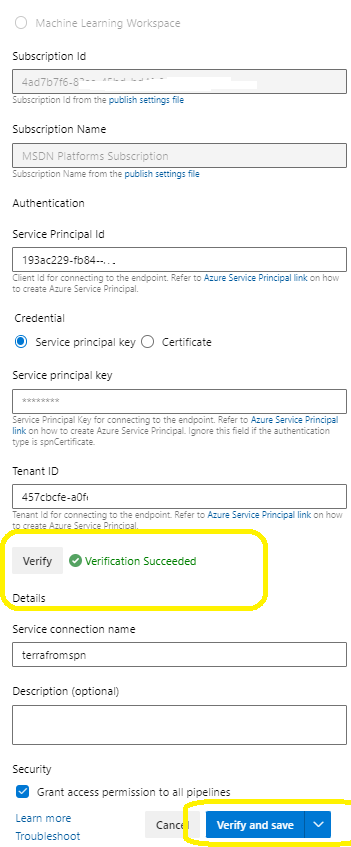
First lets understand this ,a “Service Connection” represent a Service Principal in Azure AD,an identity which uses Headless authentication (think of it as a user who have some rights to do in a certain resources ) .
After you have entered all the necessary information, click Verify to check that the setup is correct. When you see Verification Succeed, click Save, and you are ready to go.
Now with this , the first part is set and ready , in the next part we will create the pipeline and deploy our aks .









Comments 1