Welcome to this new blog post as we continue to see how to disable the default domain “azurewebsites.net” assigned to an Azure Web App but this time using application gateway instead of cloudflare.
When you create a web app in Azure, by default, it is assigned a subdomain of “azurewebsites.net” which is used to access your web app over the internet. However, in some cases, you may want to use your custom domain name to access your web app instead of the default one. In this blog post, we will walk you through the steps to disable the default domain and configure your custom domain name for your Azure Web App. We will provide you with detailed instructions and examples to make the process easy to follow. So, let’s get started and learn how to disable the default domain assigned to your Azure Web App.
Prerequisites :
- azure
- Having a domain name in GoDaddy
Use Case
Mr. X, the current team manager, has recently proposed an idea that the company website should only be accessible through a custom domain name. To achieve this, he wants to disable access to the default domain “azurewebsites.net” for our web app, similar to how we restrict access to our private web apps. The end goal is to ensure that our web app is accessed only through our chosen custom domain name, providing a more professional and consistent user experience for our customers and to be able too to secure it using waf . In this blog post, we will explore the steps to disable the default domain and configure a custom domain name for our Azure Web App, following Mr. X’s idea. We will provide you with a comprehensive guide, including practical examples, to help you achieve this with ease. So, let’s dive in and learn how to disable the default domain for our Azure Web App and configure a custom domain name.
Azure Web App Service
Azure Web Apps is a service provided by Microsoft Azure that allows users to deploy and manage web applications in a cloud environment. It provides a platform for hosting web applications, such as websites, web APIs, and mobile app backends, without the need for managing the underlying infrastructure. Azure Web Apps supports a wide range of programming languages, including .NET, Java, Node.js, Python, PHP, and Ruby, and provides integration with various tools and frameworks, such as Visual Studio, GitHub, and Docker. It also offers features such as automatic scaling, load balancing, and continuous deployment, making it a popular choice for hosting web applications in the cloud. With Azure Web Apps, users can focus on developing and deploying their web applications while leaving the management of the underlying infrastructure to Microsoft Azure.
Let’s assume you have already created the web app and now we are going to add domain name .
First step is to go to our web app and click on custom domains and click add custom domain (you should have a domain name and an active ssl certificate )
Now after following the same old steps with Goddady same as in this blog post : https://achrafbenalaya-ekgvbjdjgta4b4hz.francecentral-01.azurewebsites.net/2023/05/14/block-the-default-url-assigned-to-the-azure-web-app/your domain will be configured with your web application and you can access it with your own domain name also with azure websites domain .
Now its time to deploy and configure azure application gateway .Azure Application Gateway
Azure Application Gateway is a powerful and scalable web traffic load balancer and application delivery controller offered by Microsoft Azure. It acts as a gateway for managing and optimizing incoming traffic to your web applications, providing enhanced security, high availability, and improved performance.
With Azure Application Gateway, you can easily distribute incoming traffic across multiple backend servers, ensuring efficient utilization of resources and preventing overload. It supports both Layer 7 load balancing, which enables routing based on application-specific information, and SSL/TLS termination, which offloads the burden of encryption from your backend servers.
One of the key features of Azure Application Gateway is its ability to perform application-layer routing and URL-based path routing, allowing you to direct traffic to specific backend pools based on URL patterns or hostnames. This flexibility enables you to deploy multiple web applications behind a single gateway, simplifying management and reducing costs.
In addition to traffic distribution, Azure Application Gateway offers various advanced functionalities. These include web application firewall (WAF) capabilities to protect your applications against common web attacks, cookie-based session affinity for maintaining session consistency, and automatic scaling to handle traffic spikes without manual intervention.
With its integration with other Azure services like Azure Active Directory, Azure Monitor, and Azure Log Analytics, you gain comprehensive monitoring and logging capabilities for your applications, helping you identify performance bottlenecks, troubleshoot issues, and ensure compliance.
Overall, Azure Application Gateway is a valuable tool for managing and securing your web applications, providing a reliable and efficient solution for traffic distribution, scalability, and advanced application delivery features in the Azure cloud environment.
One of the greatest thing in azure portal that it can help you choose the right load balancer for you :
By answering to a few questions azure will recommend to you which is better choice for you :

 Now lets deploy azure application gateway :
  Here are the differences between the various tiers of Azure Application Gateway:1. Azure Application Gateway Standard v2:
– Supports autoscaling based on demand.
– Provides higher scalability and performance compared to the Standard tier.
– Supports SSL termination, URL-based routing, and cookie-based session affinity.
– Offers faster provisioning and configuration updates.
– Supports integration with Azure Private Link for secure connectivity.
– Provides increased backend pool capacity.2. Azure Application Gateway Standard:
– Does not support autoscaling; capacity is fixed.
– Provides basic load balancing and SSL termination.
– Supports URL-based routing and cookie-based session affinity.
– Offers slower provisioning and configuration updates compared to Standard v2.
– Does not support Azure Private Link integration.
– Has lower backend pool capacity compared to Standard v2.3. Azure Application Gateway WAF (Web Application Firewall):
– Includes all the features of the Standard tier.
– Offers built-in WAF capabilities to protect web applications from common web attacks, such as SQL injection and cross-site scripting (XSS).
– Provides OWASP (Open Web Application Security Project) rule sets for added security.
– Allows customization of WAF rules to meet specific application requirements.
– Provides comprehensive logging and monitoring for WAF events and security alerts.
– Supports Azure Security Center integration for enhanced threat intelligence.4. Azure Application Gateway WAF v2:
– Combines the features of Standard v2 with built-in WAF capabilities.
– Offers higher scalability and performance compared to WAF.
– Provides advanced WAF rule sets and customizable rule configurations.
– Offers faster provisioning and configuration updates compared to WAF.
– Supports integration with Azure Private Link for secure connectivity.
– Provides increased backend pool capacity.In summary, the differences between the tiers lie in the scalability, performance, WAF capabilities, and feature sets offered by each tier. The Standard v2 and WAF v2 tiers provide higher scalability, performance, and advanced features compared to the Standard and WAF tiers, respectively.
Now le’ts configure our application gateway (I choosed WAF V2 )
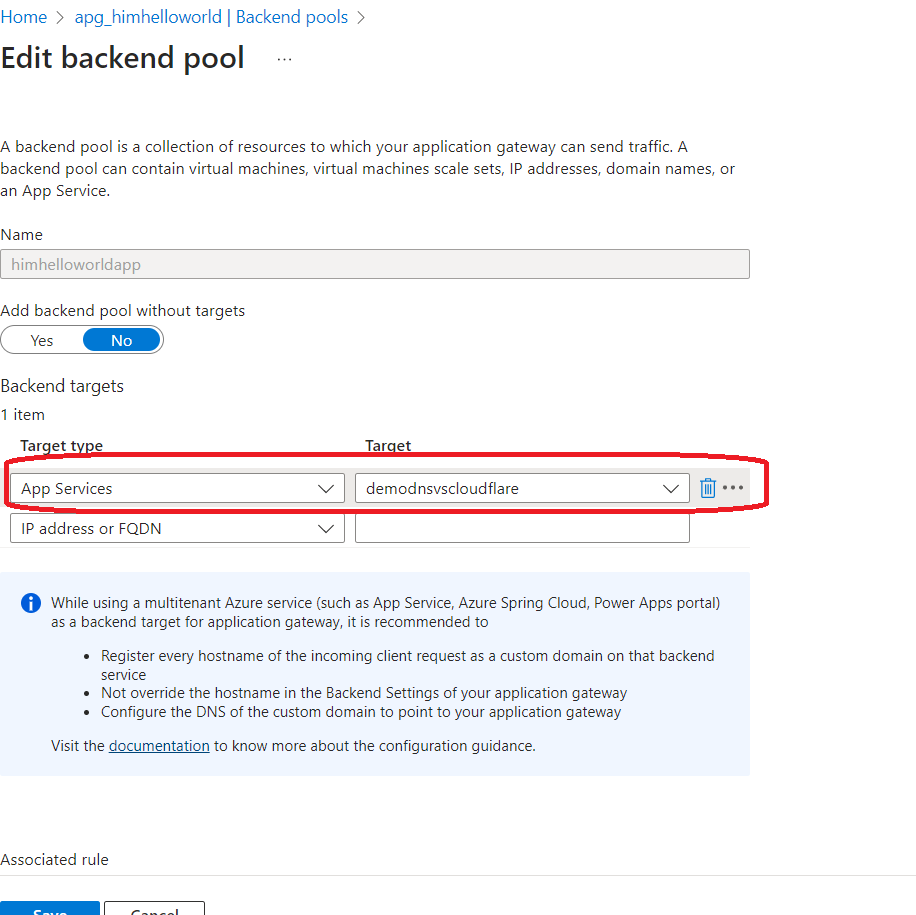
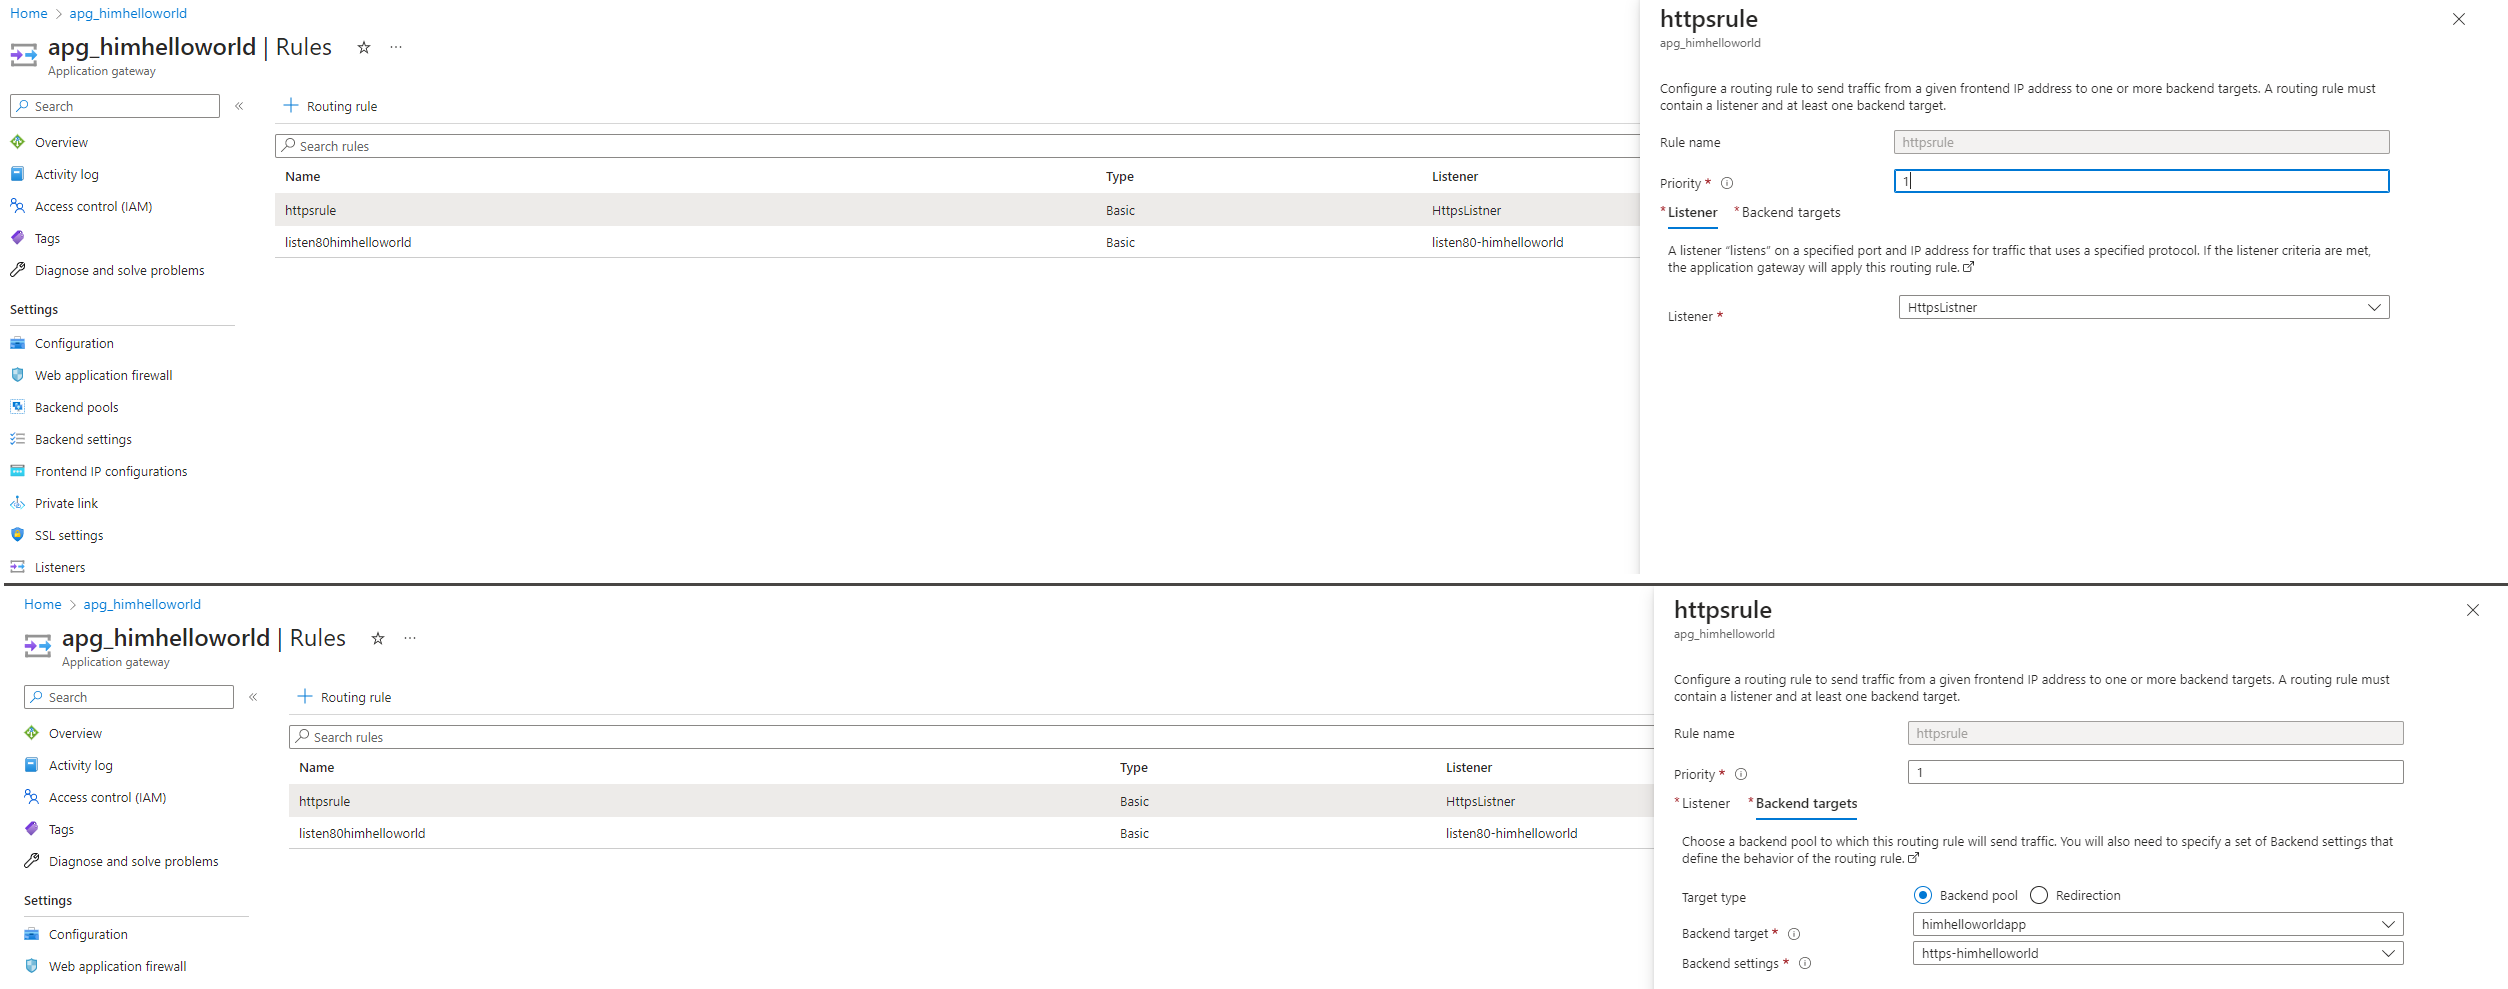
The first thing we need to do is to add our backend , in our case its very simple , azure app service :
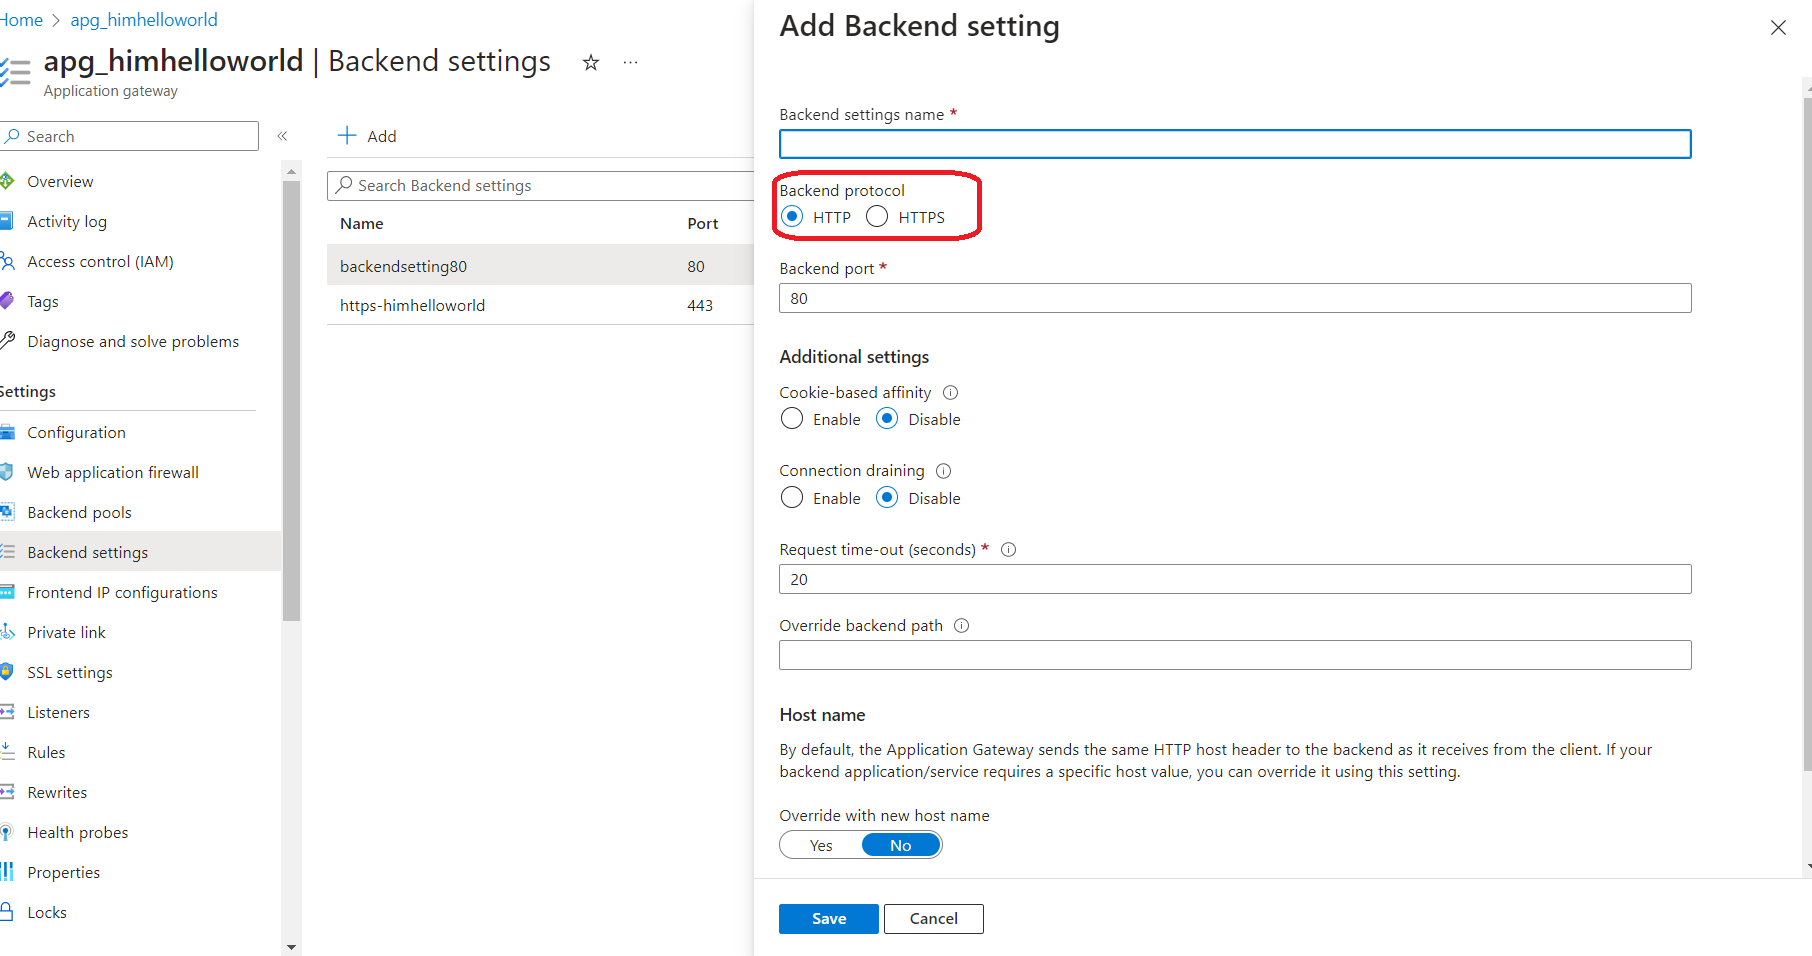
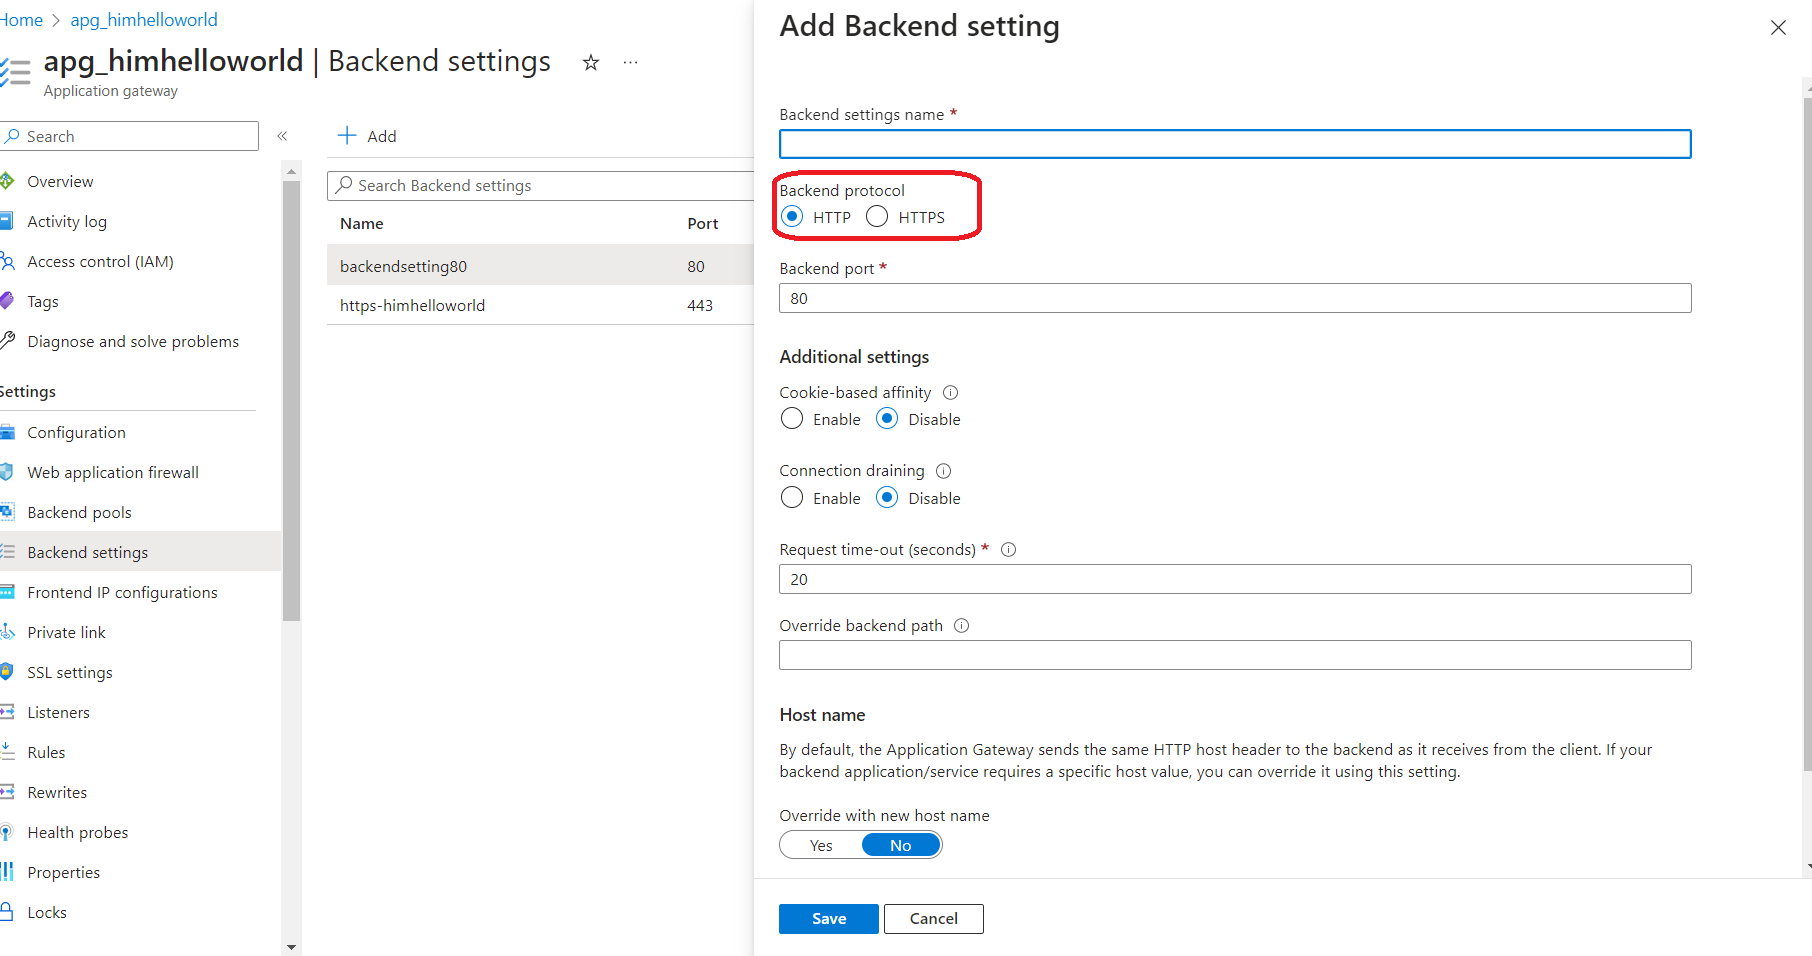
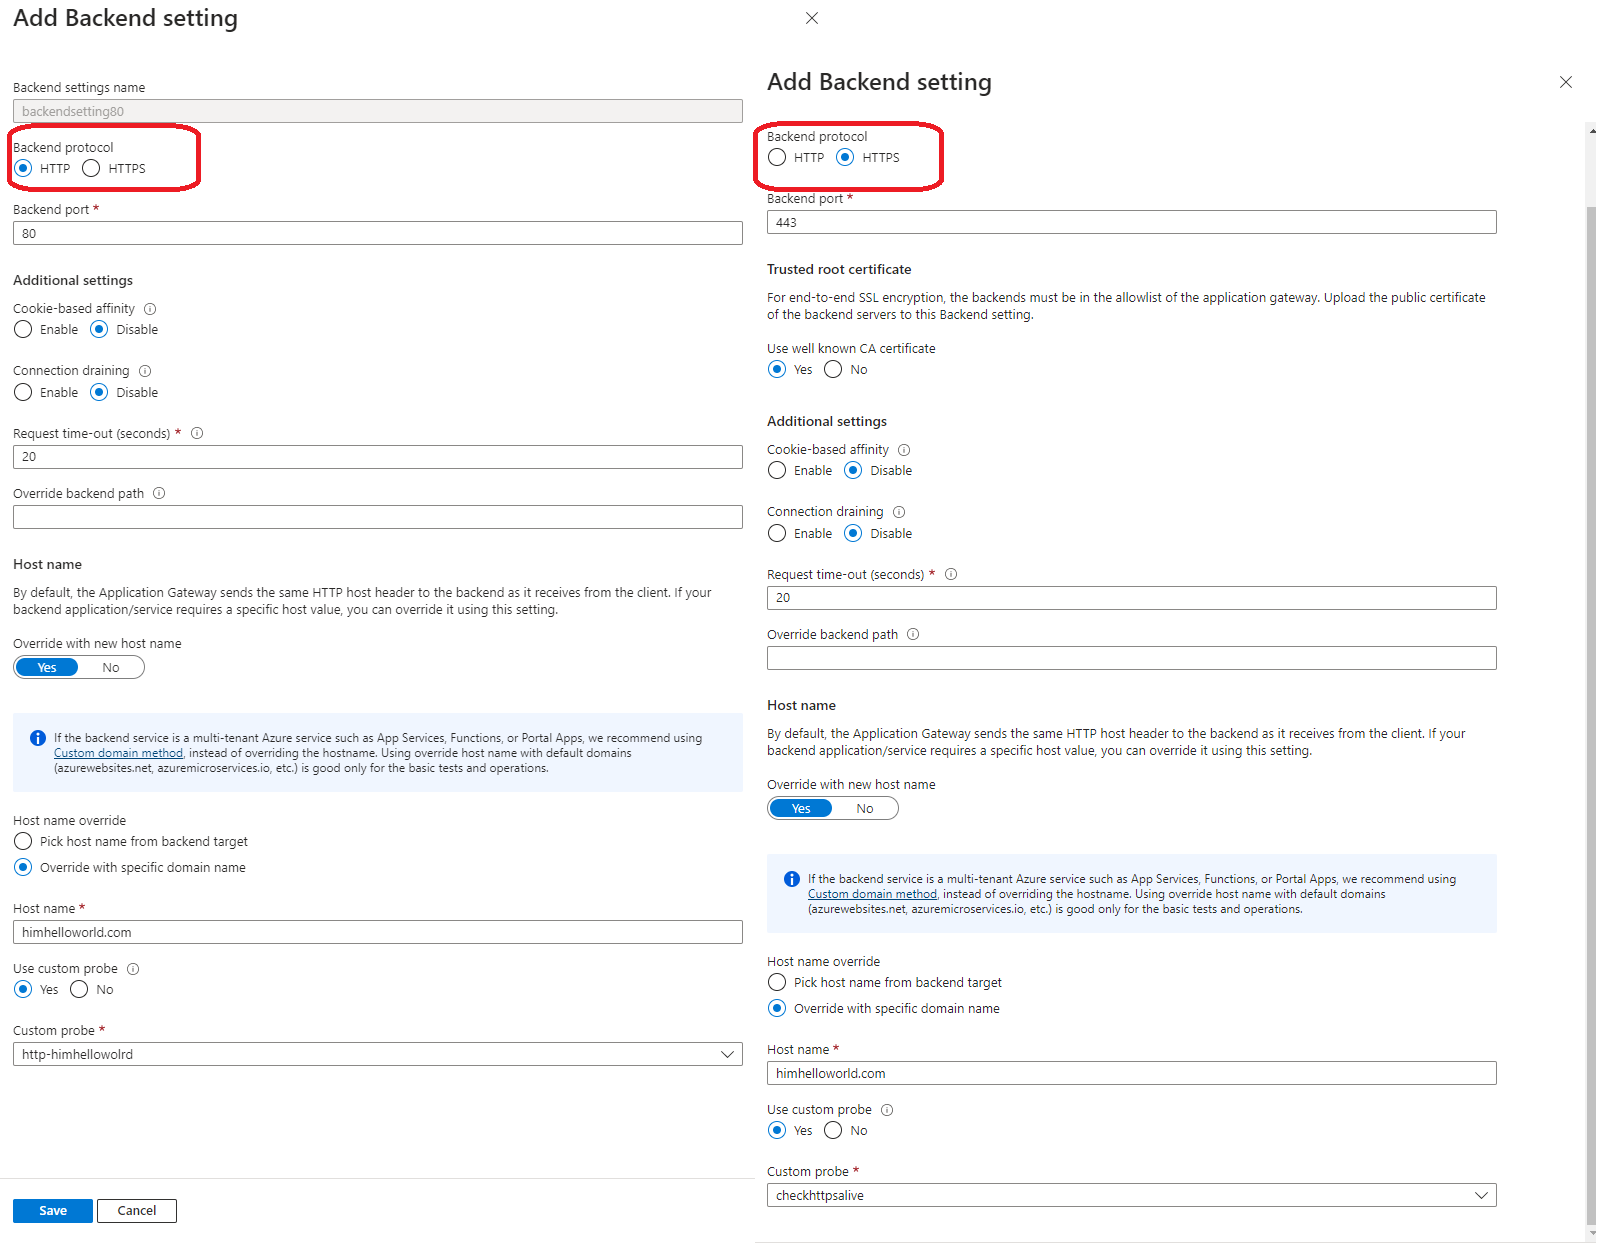
 Now we are going to create backend setting (used to be http settings) , we need to create a setting for http and another one for Https

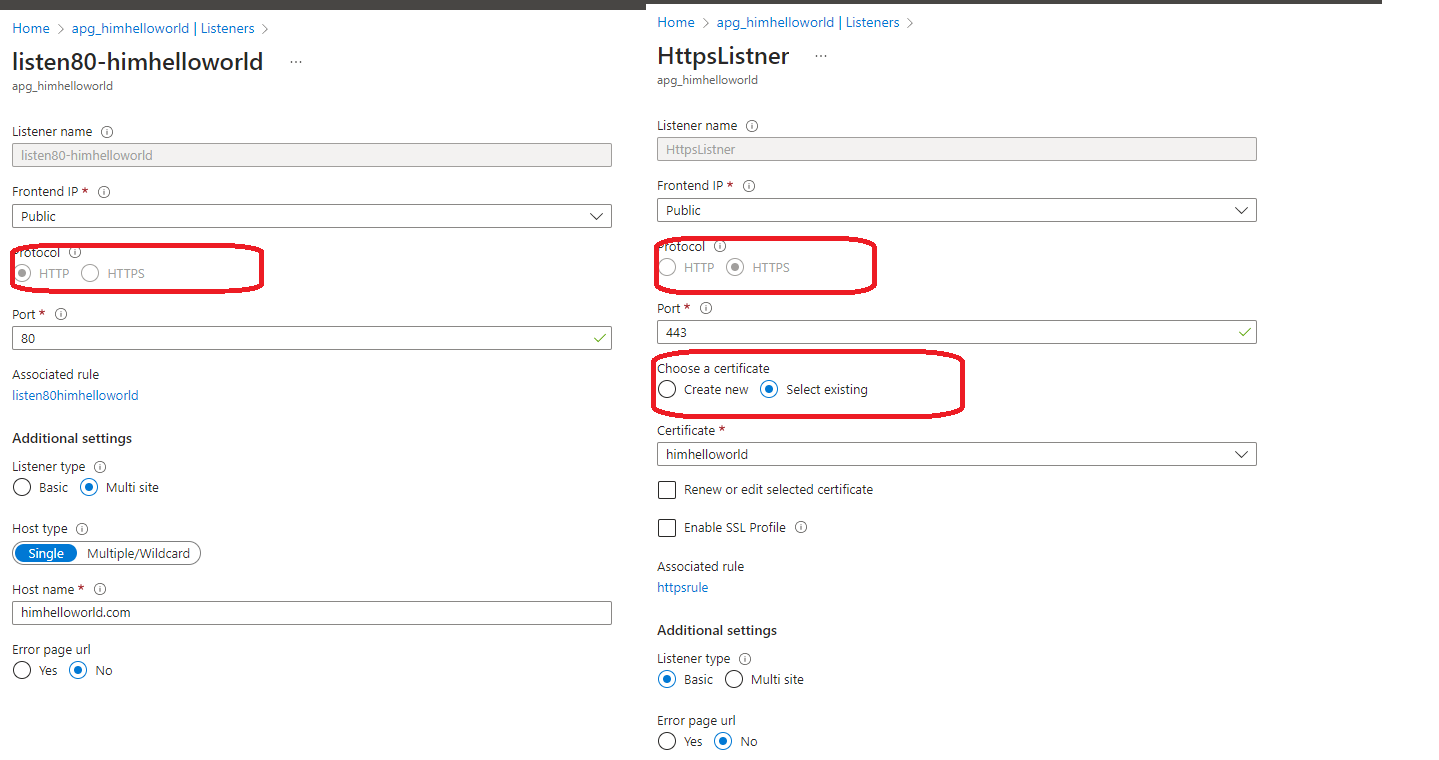
 Now it’s time to configure listner :
In Azure Application Gateway, a listener is a configuration component that defines how the gateway should listen for incoming traffic and process it. It acts as a frontend endpoint for the application gateway and specifies the protocol, port, and SSL/TLS settings to use when receiving requests from clients.


 Now we are going to add health probe :
In Azure Application Gateway, a health probe is a mechanism used to monitor the availability and health of the backend servers that host your web applications. It periodically sends requests to the backend servers and evaluates the responses to determine their health status. Health probes are crucial for ensuring that the application gateway only routes traffic to healthy and functioning backend servers, providing a reliable and efficient service to clients.Here are the key aspects of health probes in Azure Application Gateway:
1. Endpoint: A health probe is configured with a specific endpoint on the backend servers to which it sends health check requests. This endpoint can be a URL, IP address, or a combination of both, depending on your backend configuration.
2. Protocol and Port: The health probe specifies the protocol (HTTP or HTTPS) and the port number to use for sending health check requests to the backend servers. It mimics client requests to verify if the backend servers are responding properly.
3. Interval and Timeout: You can define the interval at which the health probe sends requests and the timeout period within which it expects a response. The interval determines how frequently the health probe checks the backend server’s health, while the timeout determines the maximum time it waits for a response before considering the backend server as unhealthy.
4. Health Criteria: The health probe evaluates the response received from the backend servers based on predefined health criteria. This typically involves checking the HTTP status code of the response or inspecting specific content within the response to determine if the server is functioning correctly.
5. Unhealthy Threshold: The unhealthy threshold is the number of consecutive failed health checks before the backend server is marked as unhealthy. Once the threshold is reached, the application gateway stops routing traffic to the unhealthy server until it recovers.
By configuring health probes in Azure Application Gateway, you can continuously monitor the health of your backend servers and ensure that only healthy servers receive traffic. Unhealthy servers are automatically removed from the pool, preventing client requests from being sent to them, and minimizing disruptions to your applications.
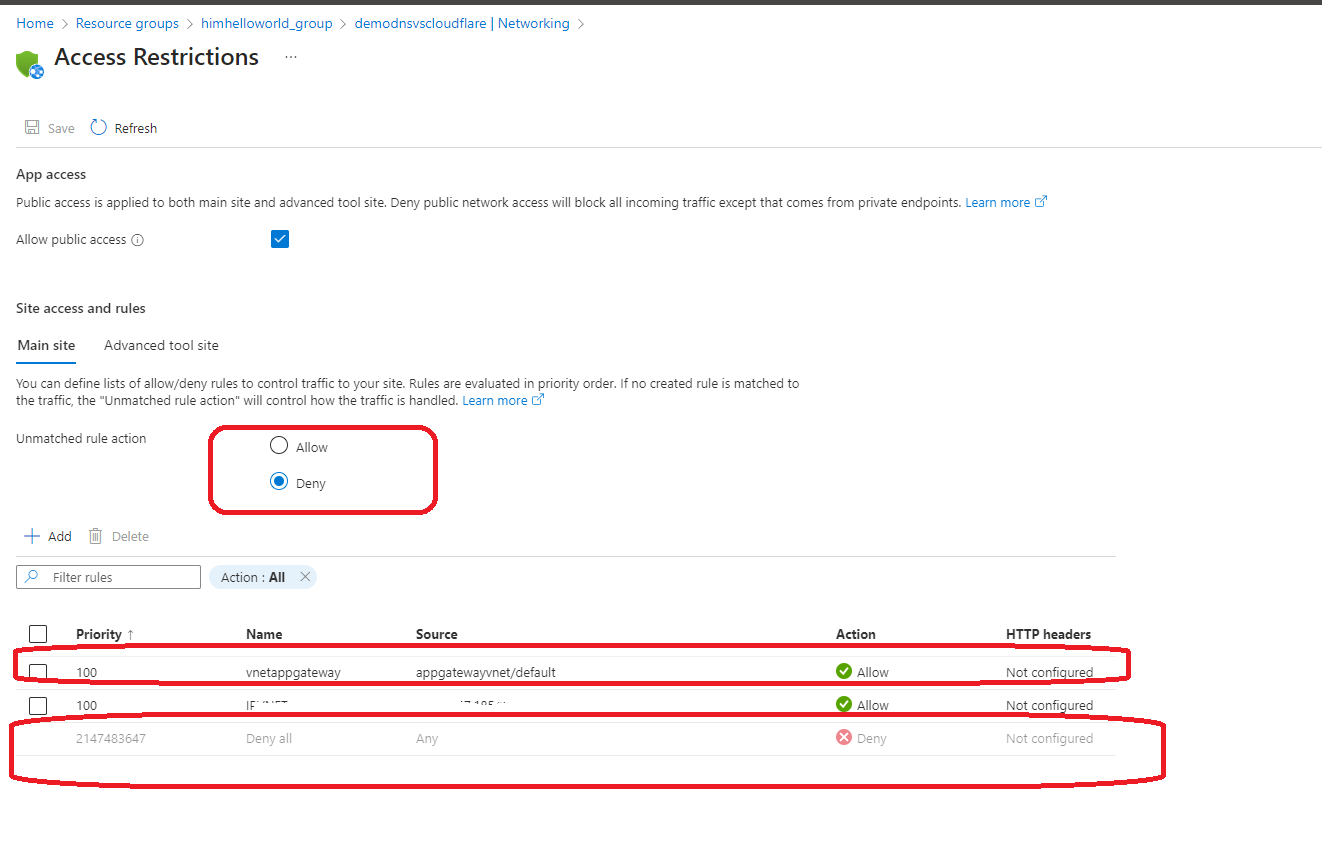
 Now two more step in order to make this work , we need to allow our application gateway in azure app service and deny everything else, also we need to add the ip of the azure application record into godaddy .
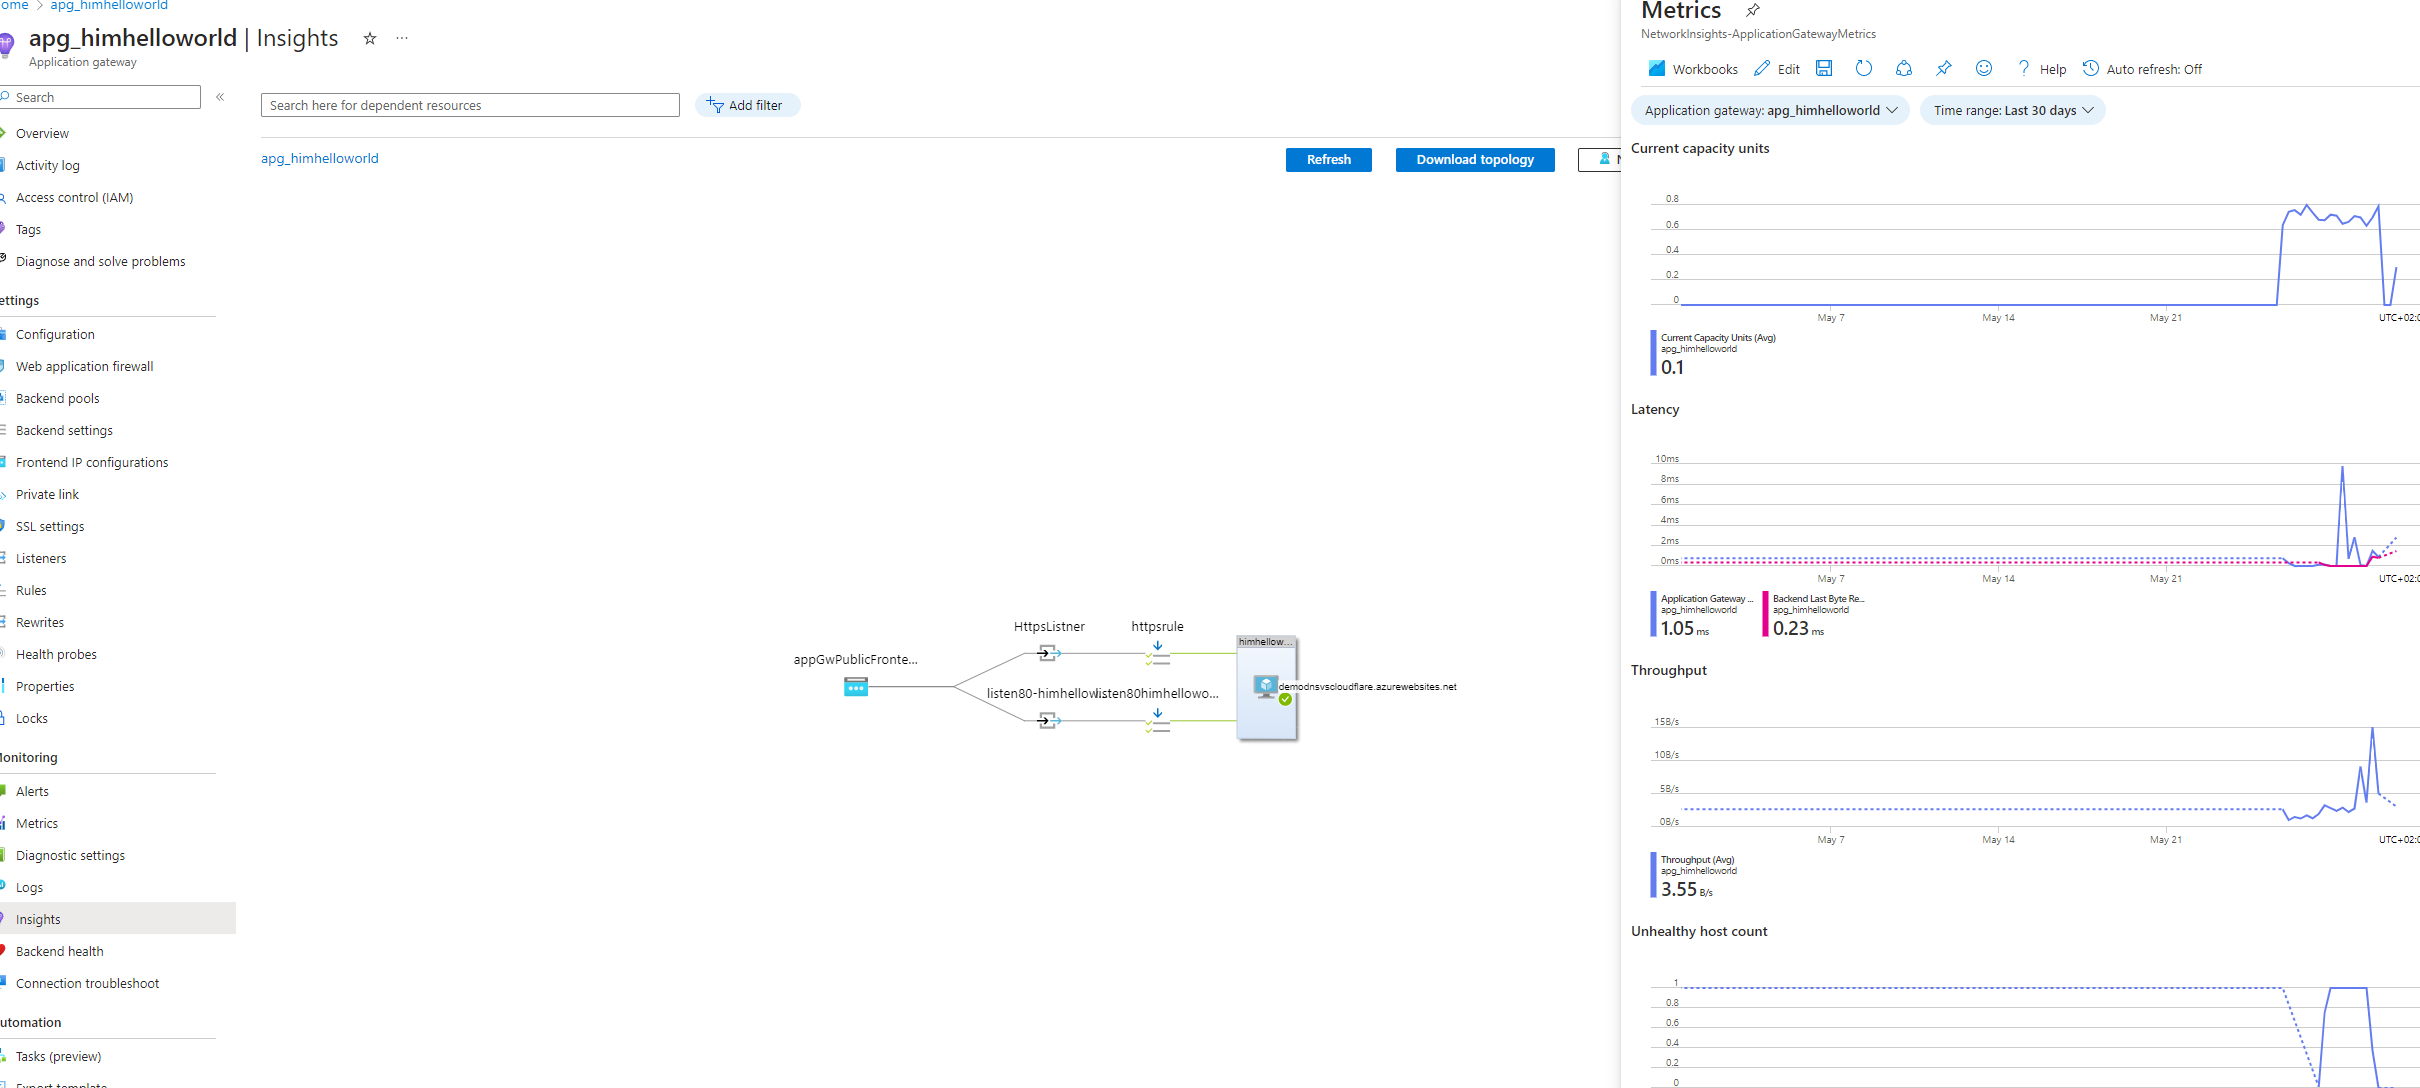
 Now , if we check our azure app gateway health we will see :
everything indicate that is fine , lets visit our web app and check if it work ;
 Having successfully accomplished our initial objective, we now set our sights on the next exciting phase: transitioning from GoDaddy to Microsoft Azure DNS. In our upcoming blog post, we will explore the advantages and steps involved in migrating our domain management to Azure DNS.
By embracing Microsoft Azure DNS, we unlock a range of compelling benefits and features. Azure DNS provides a scalable, reliable, and globally distributed DNS service, ensuring that our domain’s DNS resolution remains swift and resilient.
One key advantage of Azure DNS is its seamless integration within the broader Azure ecosystem. By utilizing Azure DNS, we can effortlessly connect our domain to various Azure services such as virtual machines, web apps, and Azure Front Door, simplifying the management and configuration of our infrastructure.
Azure DNS also empowers us with advanced capabilities for traffic management. With features like Traffic Manager, we can intelligently route DNS queries based on geographic location, ensuring optimal performance and minimal latency for our users worldwide.
Security is paramount, and Azure DNS excels in this regard. Microsoft employs stringent security measures to protect our DNS records from unauthorized access or tampering, providing peace of mind that our domain’s integrity and confidentiality are safeguarded.
In our forthcoming blog post, we will provide a comprehensive guide on seamlessly migrating from GoDaddy to Azure DNS. We will delve into the step-by-step process of transferring DNS records, configuring DNS settings, and ensuring a smooth transition without any disruptions to our online presence.
Stay tuned for valuable insights, practical tips, and best practices that will empower you to harness the power of Microsoft Azure DNS. Our upcoming blog post will be your go-to resource for unlocking the full potential of Azure’s DNS service and taking your domain management to the next level.


